

How to Change an EC2 Instance Type is an important skill for anyone managing AWS infrastructure. AWS EC2 offers over 700 instance types — and choosing the wrong one can mean overpaying by up to 40% or bottlenecking your application’s performance under real load. The good news is that once you understand the process, changing an EC2 instance type usually takes less than five minutes.
The real problem isn’t the process — it’s neglect. Engineering teams provision an instance, deploy an application, and never revisit that configuration again. Months later, a t2.medium is straining under production load it was never designed to handle, or an r5.4xlarge is running at 8% CPU utilization and burning $500/month in wasted compute.
In this complete guide, you’ll learn exactly how to resize an EC2 instance — covering prerequisites, the full step-by-step process for both EBS-backed and instance store-backed instances, the AWS CLI method, how to choose the right instance type before making the change, and every mistake to avoid along the way.
Why Would You Change an EC2 Instance Type?
Before executing a change, it’s worth understanding the four most common reasons engineers change an EC2 instance type in production.
Scale Up: Adding More CPU, RAM, or Network Throughput
When an application’s resource demands grow beyond what the current instance can provide — CPU saturation, memory pressure, or network bandwidth limits — upgrading the EC2 instance type is the fastest path to restoring performance. A monitored spike in CPUUtilization above 80% sustained across hours in Amazon CloudWatch is the clearest signal that it’s time to scale up.
Scale Down: Right-Sizing to Cut AWS Costs
Over-provisioned instances are one of the most common sources of unnecessary AWS spend. If AWS Compute Optimizer flags an instance as over-provisioned — showing that average CPU utilization is below 20% and memory is barely touched — downgrading the EC2 instance type (right-sizing) can reduce compute costs by 30–50% without any impact on application performance.
Changing Workload Type (CPU-Intensive to Memory-Intensive)
As applications evolve, their resource profiles change. A service that started as a stateless API (CPU-bound) may evolve into an in-memory data processing layer (memory-bound). Moving from a C-series (compute-optimized) to an R-series (memory-optimized) instance aligns the hardware profile to the actual workload — delivering better performance at similar or lower cost.
Migrating to Newer Generation Instances (e.g., to AWS Graviton)
AWS regularly releases newer instance generations that deliver significantly better price-performance than their predecessors. Migrating from an older m5.large to an m7g.large (AWS Graviton3, ARM-based) delivers approximately 40% better price-performance with no application code changes required for most Linux workloads. For teams not yet on Graviton, this is the highest-ROI EC2 instance type change available in 2026.
Prerequisites Before Changing an EC2 Instance Type
Before initiating any EC2 instance type change, verify every item in this checklist:
1. Confirm EBS-Backed Root Volume (Not Instance Store)
The simplest way to change EC2 instance type is only possible when your root volume is an Amazon EBS (Elastic Block Store) volume. In the EC2 console, select your instance → Storage tab → confirm the Root Device Type is ebs. If the root device type shows instance store, follow the separate process in the next section.
2. Verify Virtualization Type Compatibility (HVM vs. PV)
AWS EC2 instances use two virtualization types:
- HVM (Hardware Virtual Machine) — supported by all modern instance types; uses hardware extensions for near-native performance
- PV (Paravirtual) — older generation; supported only by legacy instance families
You cannot change a PV instance directly to an HVM instance type. In the EC2 console, check Instance Details → Virtualization type. If it shows paravirtual, you must create a new AMI and launch a fresh HVM instance.
3. Check CPU Architecture Compatibility (x86 vs. ARM)
You cannot change directly between x86 (Intel/AMD) and ARM (AWS Graviton) instance types. If you’re migrating from an Intel m6i.large to a Graviton m7g.large, the process requires creating an AMI, testing application compatibility with the ARM architecture, and launching a new instance — not a simple in-place resize.
Quick architecture reference:
- x86_64 — T3, M6i, C6i, R6i, P4, I4i families (Intel/AMD)
- arm64 — T4g, M7g, C7g, R7g families (AWS Graviton)
4. Confirm Network Compatibility (VPC Requirement)
All modern EC2 instance types require your instance to run inside an Amazon VPC. Legacy EC2-Classic instances (retired in 2022) cannot be resized to newer instance types. Confirm your instance is VPC-based by checking the VPC ID in Instance Details.
5. Install Required Drivers (NVMe and ENA)
Newer instance types (Nitro-based: M5, C5, R5 and later) require:
- NVMe (Non-Volatile Memory Express) drivers — for NVMe SSD instance storage and EBS volumes presented as NVMe devices
- ENA (Elastic Network Adapter) drivers — for enhanced networking at up to 100 Gbps
Install these drivers before stopping the instance if you’re changing from an older generation (e.g., M4 → M6i). On Amazon Linux 2023 and Ubuntu 20.04+, these drivers are pre-installed. On older AMIs, install manually or the instance may fail to boot after the type change.
6. Plan for Downtime and IP Address Changes
Changing an EC2 instance type requires stopping the instance — which means downtime. Key points to plan for:
| IP Type | Behavior During Stop/Start |
| Private IP | Retained — never changes |
| Elastic IP (EIP) | Retained — use EIP to preserve public IP |
| Auto-assigned Public IP | Changes on every stop/start |
| Instance ID | Retained — same instance ID after resize |
Action Required: If your instance uses an auto-assigned public IP and external systems reference it directly, allocate and attach an Elastic IP before making the change — or update your DNS records after the restart.
How to Change an EC2 Instance Type (EBS-Backed) — Step-by-Step
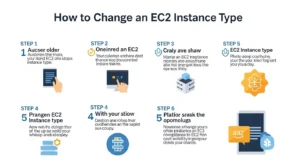
This is the standard process for the vast majority of EC2 instances. (HowTo Schema)
Step 1 — Back Up Your Instance (Snapshot or AMI)
Before making any changes, create a safety net:
Create an EBS Snapshot:
- EC2 Console → Volumes → Select root volume → Actions → Create Snapshot
- Add a description: “Pre-resize backup — YYYY-MM-DD”
Create a full AMI (recommended):
- EC2 Console → Instances → Select instance → Actions → Image and templates → Create Image
- This captures all attached EBS volumes in a single recoverable point
Pro Tip: Never skip this step. Even though EBS data persists across instance type changes, an AMI backup provides full rollback capability if something goes wrong during the transition.
Step 2 — Stop the EC2 Instance
- EC2 Console → Instances → Select your instance
- Actions → Instance State → Stop
- Confirm in the dialogue box — click Stop
- Wait until Instance State shows stopped (this takes 30–90 seconds)
Note: If your instance is part of an Auto Scaling Group (ASG), suspend the ASG health checks first to prevent the group from terminating and replacing your stopped instance: Actions → Auto Scaling → Detach, or suspend the Launch and Terminate processes in the ASG console.
Step 3 — Select “Change Instance Type” in Actions Menu
With the instance still selected and in stopped state:
- Actions → Instance Settings → Change Instance Type
Screenshot location: Show the Actions dropdown with “Instance Settings” expanded and “Change Instance Type” highlighted in the AWS Management Console.
Step 4 — Choose the New Compatible Instance Type
A dialogue box appears with a dropdown menu listing only compatible instance types — filtered by your instance’s virtualization type, CPU architecture, and network configuration.
- Select your target instance type (e.g., m6i.large, t3.xlarge, r6i.2xlarge)
- If EBS optimization is supported by the new type, optionally enable it for better EBS throughput
- If your target type isn’t listed, it’s incompatible with your current instance configuration — check architecture and virtualization type
Pro Tip: If you want to resize to an instance family that isn’t shown (e.g., you want ARM but your instance is x86), use the AMI launch method described in the Instance Store section below.
Step 5 — Apply the Change and Start the Instance
- Click Apply in the Change Instance Type dialogue
- The instance type change takes effect in seconds
- Actions → Instance State → Start
- Wait for Instance State to return to running (typically 1–2 minutes)
Screenshot location: Show the Change Instance Type dialogue with the dropdown displaying compatible types and the Apply button.
Step 6 — Verify Performance After the Change
Once the instance is running, validate the change and monitor performance:
- Confirm the new instance type in EC2 Console → Instance Details → Instance Type
- SSH into the instance and verify: lscpu (CPU count), free -h (memory)
- Monitor Amazon CloudWatch metrics for the first 30–60 minutes: CPU utilization, network throughput, memory (via CloudWatch Agent)
- Test application response times and check application logs for errors
How to Change an Instance Store-Backed EC2 Instance Type
Why Instance Store-Backed Instances Are Different
Instance store-backed instances use ephemeral storage directly attached to the physical host — unlike EBS volumes, this data cannot persist through a stop/termination. You cannot simply stop and change the type; the instance must be replaced by launching a new one from an AMI.
Step 1 — Back Up Instance Store Data to S3 or EBS
Immediately copy any critical data from instance store volumes to Amazon S3 or an attached EBS volume:
Copy
aws s3 sync /path/to/instance-store-data s3://your-backup-bucket/backup-folder/
Step 2 — Create an AMI from the Current Instance
- EC2 Console → Instances → Select instance → Actions → Image and templates → Create Image
- This captures the instance configuration including attached EBS volumes (instance store data is excluded — ensure you’ve already backed it up to S3)
- Note the AMI ID generated after creation
Step 3 — Launch a New Instance from the AMI
- EC2 Console → AMIs → Select your newly created AMI → Launch Instance from AMI
- In the launch wizard, select your target instance type
- Configure networking (same VPC, subnet, security groups as the original)
- Attach the same IAM role and Elastic IP if applicable
Step 4 — Configure Networking and Terminate Old Instance
- Once the new instance is running and verified, reassign the Elastic IP from the old instance to the new one
- Update any DNS records, load balancer target groups, or Auto Scaling Group configurations
- Test all application functionality thoroughly
- Terminate the original instance once you’ve confirmed the new instance is stable
How to Change EC2 Instance Type via AWS CLI
For automation, scripting, or teams managing infrastructure-as-code with Terraform or AWS CloudFormation, the AWS CLI provides a clean programmatic method.
AWS CLI Command to Stop an Instance
Copy
aws ec2 stop-instances \
–instance-ids i-0123456789abcdef0 \
–region us-east-1
Wait for the instance to reach the stopped state:
Copy
aws ec2 wait instance-stopped \
–instance-ids i-0123456789abcdef0 \
–region us-east-1
AWS CLI Command to Modify Instance Attribute
Copy
aws ec2 modify-instance-attribute \
–instance-id i-0123456789abcdef0 \
–instance-type ‘{“Value”: “m6i.large”}’ \
–region us-east-1
Verify the change was applied:
Copy
aws ec2 describe-instances \
–instance-ids i-0123456789abcdef0 \
–query ‘Reservations[0].Instances[0].InstanceType’ \
–output text
AWS CLI Command to Start Instance
Copy
aws ec2 start-instances \
–instance-ids i-0123456789abcdef0 \
–region us-east-1
Wait for the instance to reach the running state:
Copy
aws ec2 wait instance-running \
–instance-ids i-0123456789abcdef0 \
–region us-east-1
Automation Tip: Wrap these three commands in a shell script with error handling and SNS notification on completion for a fully automated, auditable resize workflow.
How to Choose the Right EC2 Instance Type (Before Resizing)

Don’t change to a random instance type — make a data-driven decision.
Instance Family Use Case Guide
| Instance Family | Primary Use Case | Key Metrics | Example Types |
| T3/T4g | Burstable general-purpose | CPU credits, burst | t3.medium, t4g.large |
| M6i/M7g | Balanced workloads | CPU + Memory ratio | m6i.xlarge, m7g.xlarge |
| C6i/C7g | CPU-intensive | High vCPU count | c6i.2xlarge, c7g.4xlarge |
| R6i/R7g | Memory-intensive | High RAM/vCPU ratio | r6i.4xlarge, r7g.8xlarge |
| P4/P5 | GPU/ML workloads | GPU count, VRAM | p4d.24xlarge, p5.48xlarge |
| I4i | High storage I/O | IOPS, throughput | i4i.xlarge, i4i.8xlarge |
| Graviton (ARM) | Cost optimization | Price/performance | m7g.xlarge, t4g.large |
Use AWS Compute Optimizer for Data-Driven Recommendations
AWS Compute Optimizer analyzes 14 days of CloudWatch utilization data for every EC2 instance in your account and classifies each as:
- Over-provisioned — safe to downsize; it recommends the specific target instance type and estimated monthly savings
- Under-provisioned — performance risk; it recommends upgrading and identifies the bottleneck metric
- Optimized — current type is well-matched to actual usage
- None — insufficient data (less than 30 hours of utilization)
Access Compute Optimizer recommendations directly in the EC2 console: select an instance → Details tab → Finding section. You’ll see the recommendation, the projected monthly savings, and the performance risk rating side-by-side.
Analyze CloudWatch Metrics (CPU, Memory, Network)
Before any resize decision, pull these CloudWatch metrics for at least 7 days:
- CPUUtilization — sustained above 80%? Scale up. Sustained below 20%? Scale down
- NetworkIn/Out — approaching instance network bandwidth ceiling? Consider a network-optimized type
- Memory — requires CloudWatch Agent; essential for right-sizing memory-optimized instances
- DiskReadOps/WriteOps — high I/O wait suggests a storage-optimized instance may be needed
Consider Reserved Instances After Right-Sizing
Critical sequencing: Right-size first, then commit. Purchasing Reserved Instances on over-provisioned EC2 instances locks you into paying for capacity you don’t need. Use Compute Optimizer to identify the optimal instance type, validate it under real production load for at least 2 weeks, then purchase a 1-year Reserved Instance for up to 40% savings over On-Demand.
Graviton Migration: When ARM-Based Instances Make Sense
AWS Graviton3/4 instances deliver 20–40% better price-performance than equivalent Intel/AMD x86 instances for most Linux workloads. Graviton migration makes sense when:
- Your application stack is Linux-native (no Windows dependencies)
- You use open-source runtimes (Node.js, Python, Java, Go, PHP) — all support ARM64
- You want to reduce monthly EC2 costs without accepting performance trade-offs
- Your container images support multi-architecture builds (AMD64 + ARM64)
Migration process: test your application on a Graviton instance in a staging environment, run performance benchmarks, then use the AMI launch method to deploy the new instance type in production.
Common Mistakes When Changing EC2 Instance Types
Forgetting to Back Up Data Before Stopping
The most critical mistake. While EBS data is preserved during an instance type change, hardware failures during the stop/start cycle (rare but possible) can corrupt EBS volumes. Always create a snapshot or AMI first — it takes 2 minutes and provides complete insurance.
Selecting an Incompatible Instance Type
If you manually type an instance type name instead of using the console dropdown, you may select a type incompatible with your instance’s architecture or virtualization type. The instance will fail to start. Always use the console dropdown (which filters compatible types automatically) or verify compatibility in the AWS documentation before using CLI.
Missing NVMe or Enhanced Networking Drivers

Changing from an older generation instance (M4, C4, R4) to a Nitro-based instance (M5, C5, R5 and newer) without first installing NVMe drivers and ENA drivers will cause the instance to fail to boot after the type change. Install drivers before stopping the instance.
Not Accounting for IP Address Changes
Auto-assigned public IPv4 addresses change every time an instance stops and starts. If external services, APIs, firewall rules, or DNS records reference your instance’s public IP directly, they will break after the resize. Allocate and associate an Elastic IP (EIP) before the change to maintain a static public address.
Failing to Disable Auto Scaling Health Checks
If your instance is part of an Auto Scaling Group, the ASG will mark the stopped instance as unhealthy and attempt to terminate and replace it during the resize window. Before stopping, either remove the instance from the ASG temporarily or suspend the ASG’s Launch and Terminate processes.
What Happens When You Change an EC2 Instance Type?
Does Changing Instance Type Delete Data?
No — for EBS-backed instances. All Amazon EBS volumes (root and data volumes) persist exactly as they were. Only instance store (ephemeral) data is lost, as it is physically tied to the underlying host hardware.
Does the Instance ID Change?
No — the instance ID (e.g., i-0123456789abcdef0) is preserved across instance type changes. All associated metadata, tags, EBS volume attachments, and IAM role associations remain intact.
Will My IP Address Change?
- Private IP: Retained (always stable within VPC)
- Elastic IP: Retained (statically associated)
- Auto-assigned Public IP: Will change — assign an Elastic IP to prevent this
How Long Does the Process Take?
- Stopping the instance: 30–90 seconds
- Changing the instance type: ~5 seconds (console) or ~2 seconds (CLI)
- Starting the instance: 60–120 seconds
- Total process: typically 2–5 minutes from stop to running state
Will I Be Charged During the Stopped State?
No On-Demand compute charges apply while the instance is stopped. However, you continue to pay for:
- EBS storage — all attached volumes bill at the standard EBS rate per GB-month
- Elastic IP addresses — EIPs not associated with a running instance incur a small hourly charge
- Provisioned IOPS — io1/io2 volumes bill for provisioned IOPS regardless of instance state
EC2 Instance Type Change: Post-Checklist
After your instance restarts on the new instance type, verify each item:
- Confirm new instance type in EC2 Console → Instance Details → Instance Type
- Verify application is running: systemctl status <your-app> or check application health endpoint
- Confirm expected CPU count: lscpu | grep “CPU(s)”
- Confirm expected memory: free -h
- Check CloudWatch metrics: CPUUtilization, NetworkIn/Out, memory (first 30 minutes)
- Verify EBS volumes are mounted correctly: df -h
- Test application end-to-end: run smoke tests or health check scripts
- Confirm Elastic IP is still associated (if applicable)
- Re-enable Auto Scaling Group health checks (if suspended)
- Update documentation/runbooks with new instance type
- Set a calendar reminder to evaluate performance again in 14 days
Frequently Asked Questions: How to Change EC2 Instance Type
Q1: Can I change the EC2 instance type without stopping the instance? No. AWS requires the instance to be fully stopped (not just hibernated) before you can change its instance type. Plan for a short maintenance window to execute the change. Most changes complete in under 5 minutes.
Q2: Will I lose my data when I change an EC2 instance type? No, EBS volume data is preserved when you stop and change an EC2 instance. However, instance store (ephemeral) data is lost on stop. Always take an EBS snapshot or create an AMI before making changes as a precaution.
Q3: Will my IP address change after I resize an EC2 instance? Your private IP and Elastic IP addresses are retained. However, the auto-assigned public IPv4 address will change when the instance stops and restarts. Use an Elastic IP to maintain a static public address.
Q4: How long does it take to change an EC2 instance type? Changing the instance type itself takes seconds in the console. However, the full process — including stopping, modifying, and restarting — typically takes 2–5 minutes. Add time for testing and verification afterward.
Q5: Can I change from a T3 to a C5 instance type directly? Yes, as long as both use HVM virtualization (which T3 and C5 do) and the same CPU architecture (x86_64). The AWS console will only show compatible instance types in the dropdown for your specific instance configuration.
Conclusion
Knowing how to change an EC2 instance type is one of the most practical AWS skills for any DevOps engineer, sysadmin, or cloud architect. Whether you’re scaling up to handle growth, right-sizing to eliminate waste, or migrating to a modern Graviton instance for better price-performance — the process is straightforward when you follow the right steps. Platforms like GoCloud provide expert AWS guidance and resources to help teams manage and optimize their EC2 infrastructure more efficiently.
Here are the essential takeaways from this guide:
- Always stop the instance first — changes cannot be made while the instance is running
- EBS-backed instances: a simple 6-step process in the AWS Console or 3 CLI commands
- Instance store-backed instances: create an AMI and launch a new instance from it
- Use AWS Compute Optimizer for data-driven right-sizing before committing to any change
- Elastic IPs preserve your public IP — allocate one before the change to avoid disruptions
- Back up first, always — a 2-minute snapshot prevents hours of recovery work
Want to go deeper? Explore our complete guide on understanding EC2 instance types to understand which family best fits your workload — or consider replacing EC2 with AWS Lambda for event-driven architectures and the AWS Fargate serverless alternative to EC2 for containerized workloads that benefit from zero infrastructure management.
In 2026, AWS Graviton4-based instances deliver the best price-performance ratio across general-purpose, compute, and memory workloads. If your current fleet is still on x86 Intel or AMD instances, now is the ideal time to evaluate an ARM migration — and this guide has given you every tool you need to make that change safely and efficiently.